Holy crap, Blogtown's upped its game! This new post page looks so different O,="
Anyways! I'm aloive!~ Been awhile? Afew days? Weeks? Month? Yeeah~
Been caught up in the assignments cause they got abit more difficult with each
assignment so yeah. Let's get back to where we left off~ Mm, chyeah~
I'm just gonna go straight into the coloring, since the
basic lineart of the drawing was covered in Lesson 1~
But before that, make sure every layer for the lineart is
set to Multiply so that everything and anything under or
over blends with the lineart. Important!
Once done with that, on a new layer below the lineart
(for most layers used for coloring/shading) using the
lasso tool you pick out the darker areas of shade, and
fill it with a shade of grey with the layer blend mode
changed to Multiply~
After that, again with the lasso tool on a new layer below
pic out areas one at a time to color in~ Lasso Hair,paint
bucket red for example~ Here is what you should've
produced so far~
Extra steps from here; you can add other little minor details like patterns and such on the character, so that this way you didn't have to draw all the little details during the lineart stage~ This also looks cleaner too! And speaking of clean, you can do an extra step; make a new layer and refine abit of the lines that may've been lost during the process.
Continuing along, make another layer and set the blend mode to Overlay, and with a big (BIG) soft edge brush, with a bright color slap on some colors that'll brighten the image:
So this is what we have so far (notice I've added text to the skirt and bright color overlay to image). Tip to make the last couple steps more noticeable; add a background layer and just fill it with a darker color :)
Last two steps! Add a new layer, and add highlights to the image~ So make the hair as shiny as you please, try not to make clothes and skin too shiny cause they don't reflect light as much as hair~ And finally, FINALLY, add a rim of light on the edges of the character~
An awesome secret technique used by the pros!
It really makes the character PoP out!
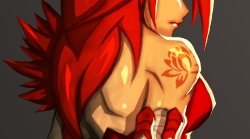
Highlights: light reflecting on hair and back.
Rim Light: that bright white/yellow stroke along her shoulder and breast~
By the end of all that, plop in a shadow underneath to character to
create a sense of space and you should have something like this! ^^
Now, an extra tip! If you're not happy and wanna add extra stuff to it, all you gotta do is group all the layers into 1 Group so your workspace isn't all too messy.
Create new layers on top and repeat the process! Draw the object you wanna add and color using the method taught in this lesson :D
If it's an object placed on top of the character, always remember to create a shadow so it blends with the already placed character.
The character seemed incomplete and
I didn't really like the hands in the first run cause it looks burnt and blistered, so I decided to add more to the picture~
< image + ...
A tail, and some fingers and glove.
=
Click + HERE + for the full size resolution and details on the concept! Thanks!
Hope this helps you guys in coloring! It may be abit to read, but trust me,
it's peasy easy! See you again soon hopefullies!~ ^^


Argh I'm seriously in awe of your colouring techniques. I can use paints to illustrate colour but in terms of anything digital like photoshop - it's a disaster waiting to happen. And how you shade as well! Just the right about of shadow! And now you've added more detail to the skirt I see, it makes it look more fabricated :D And highlighting - I love highlighting. I just find it easy and experimental. She looks pretty badass haha, awesome stuff like always Tony!
ReplyDeleteI see naruto's symbol der. Overall ds image is d awesomest! Lol. Hey, missed u man :D
ReplyDeleteYOU AND YOUR MAD COLORING SKILLS. I am so jealous like realllly. Your highlights are driving me mad. Beautiful color choices too, man! :)
ReplyDeletePHOAWWW Man!! Looks awesome, I love the way you rendered your character. Well done with choosing the colours :D
ReplyDeleteikr. Blogtown is more complicated than before. == blog more! feels so behind having 2 new drawings up on dA. :p Haha. nice Pho-nix. :) showed my dad. he asked if you copied the Pho-nix in f/g from b/g. No dad. >>" Ugh. HAHA
ReplyDeleteand that's a Lotus tattoo right? Right.
Lotus = Asian = Approved.